|
Recolouring Recherche rug - stuck!
|
#1
31-12-2013
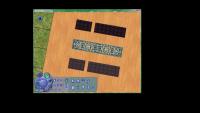
Not sure what I've done wrong with this rug but there's a large gap in it.

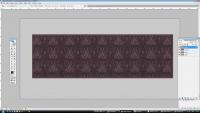
This is what the psd looks like:

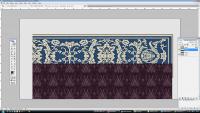
I've moved the layers down in this pic so you can see how I lined it up:

I made one layer starting from the centre of the full rug and then copied that layer, flipped it and joined it back in.
Help please
This is what the psd looks like:
I've moved the layers down in this pic so you can see how I lined it up:
I made one layer starting from the centre of the full rug and then copied that layer, flipped it and joined it back in.
Help please

Karen Lorraine, proud to be a member of LeeFish since Jan 2012.
#2
31-12-2013
For there to be a gap like that, the alpha layer is the one with the problem. I'm assuming you save it as a PNG file?
Unfortunately I don't really understand how PSD works, but I do know how SimPE works. So this is how you can check what's happening with your alpha channel.
1. Open up SimPE, and Open up your recolour package.
2. Make sure you're on the tab 'Plugin View', and select your texture 'TXTR'
3. Right Click on the image and choose 'Export Alpha Channel'
4. Close SimPE, and select the png that has '_txtr_alpha_' in the name. That will show you what your alpha channel is doing.
5. My guess is that there will be a gap in the alpha channel image where your hole is.
What I think has happened is that the alpha channel is attached to each of your layers, and when you've flipped and joined it, you've somehow amended the alpha channel as well. Lee would know better what it is.
If this is the problem, there is a simple way to fix this, believe it or not, that I can tell you how, that is paint program independent.
1. Make another recolour package of the rug. And export the image from that - it will include the original alpha channel (which is what we want). I'm going to call that "O.package"
2. Open up your recolour image that has the funny alpha channel in your paint program and save it as a BMP. The reason why you are doing this, is because you are stripping both the layers and more importantly the alpha channel from the image. Don't worry, this is not the end of the process, but it will get rid of the hole in your rug. Close your image up.
3. Open up the image from the O.package, and then open up the bitmap into your paint program.
4. Copy your bitmap image onto the O.package image. At this point the only layer that has an alpha is the O.package image.
5. Save your O.package image with your rug on it.
6. Open up your recolour of the rug, and do a build DXT using the O.package image from Step 5.
You should now have a repaired alpha channel.
#3
01-01-2014
Thank you, Kiri, but it doesn't fix it. I still have a great big gap there 

Karen Lorraine, proud to be a member of LeeFish since Jan 2012.
#5
01-01-2014
#6
01-01-2014
Can you parcel up the package/psd for me so I can have a closer look at what's happening? That looks like something strange is going on.
In the alpha channel, the white bits is where it shows, and the black bits is where it doesn't. Looking at the alpha channel that you've put up - it's should be completely showing.
In the alpha channel, the white bits is where it shows, and the black bits is where it doesn't. Looking at the alpha channel that you've put up - it's should be completely showing.
#8
01-01-2014
OK. It is a problem with the alpha.
You have two problems going on -
1. Your black is light grey so it leaves a halo.
2. Your alpha is shifted horizontally, which is why there is a gap
![[Image: kl01.jpg]](http://www.simthing.net/lee/kl01.jpg)
I've downloaded a copy of PSD to see if I can work it out... will edit this post in a bit with instructions on what to do.
Edit: Back!
OK! I see what's happened!
You copied the original onto your pattern, and when you did that PSD very helpfully centred the pattern for you instead of leaving it where it was in an absolute position.
So there are two ways to fix the 1st alpha problem of a gap:
1. (And the simplest) - copy your pattern layers onto the original and re-position it based on the original.
I've just tried this in PSD and the things to remember as you're copying it over - Ctrl+C for copy, you need to do a Ctrl+A to select the whole image, and to do it layer by layer you need to make sure you have the layer you're copying selected,before you copy it. You will not be able to copy over your effects layer in this way.
2. The second way is you need to turn off the transparency in the original, so it won't be centred and then copy it over to use that for repositioning. I've just had a look in PSD, and I'm not comfortable with how they do it, so I'd take the first way. (Lee may be able to help you with the second)
How to fix the greying of the alpha:
What it looks like it's doing is applying the effects layer to the alpha. So either you need to find some way of limiting the effects layer to just the texture and not the alpha, which is a Lee question/answer
or for the moment, you need to not use the effects layer.
But the good news is if you leave the effects layer off, and do the first way for fixing the alpha - you get it fixed:
![[Image: kl02.jpg]](http://www.simthing.net/lee/kl02.jpg)
(This post was last modified: 01-01-2014 05:51 PM by celebkiriedhel.)
#9
01-01-2014
Thank you, Kiri, I will have a go at what you suggest 

Karen Lorraine, proud to be a member of LeeFish since Jan 2012.
